There are many types of buildings in this game, each of them has specific features.
Almost all buildings can be upgraded to higher levels by clicking on them and using the green arrow ![]() . This increases your power and grants additional bonuses.
. This increases your power and grants additional bonuses.
The level of each building is always capped to the current level of the Headquarters (except special Seasonal buildings you will see in Season 1/2).
Contents
Headquarters
The Headquarters is the most important building in the game.
When the Headquarters levels up it will increment:
- Power
- Hero Level Cap
- Hero HP
- Hero Attack
- Hero Defense
- Level Cap for each building
It will also:
- Give EXP rewards (EXP Gains shown in upgrade image)
- Unlock new buildings
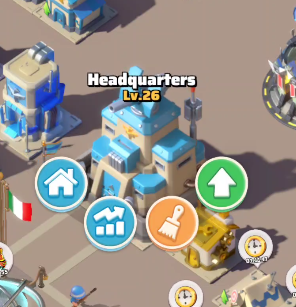
Headquarters building
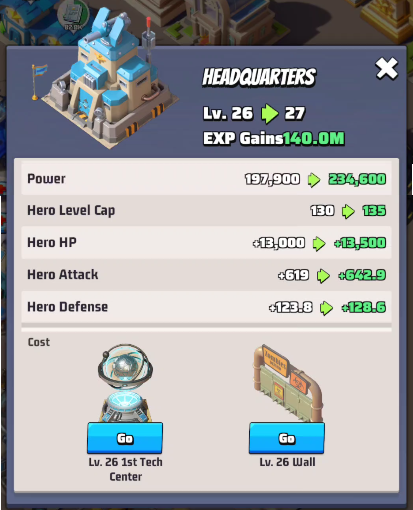
Headquarters level up bonuses and requirements
Actions
When you click on the Headquarters you can access the following actions:
 Buffs
Buffs Customizations
 Level up
Buffs
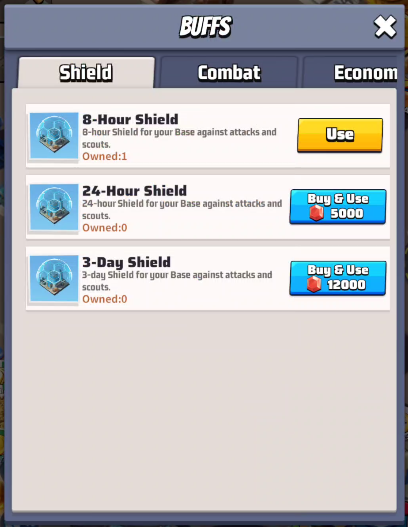
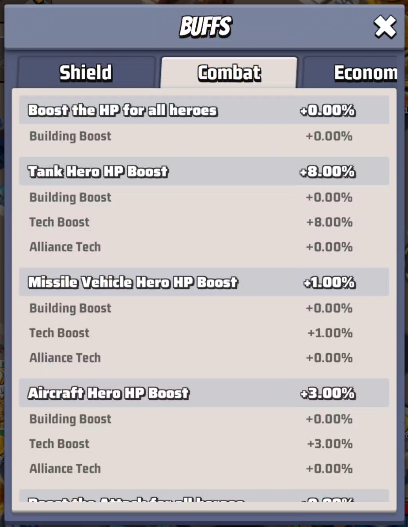
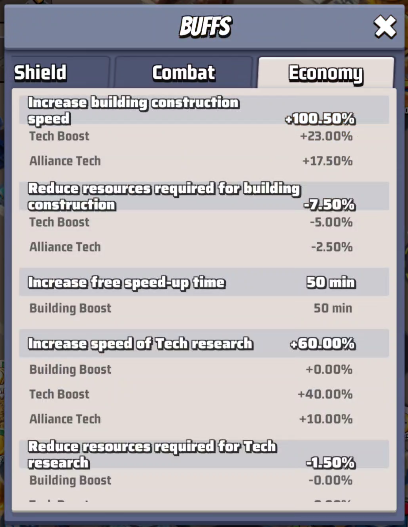
Buffs are bonuses that enhance your gameplay, in this section you can explore the aggregated values of your buffs. You can also activate/buy a shield from this section.
Customizations
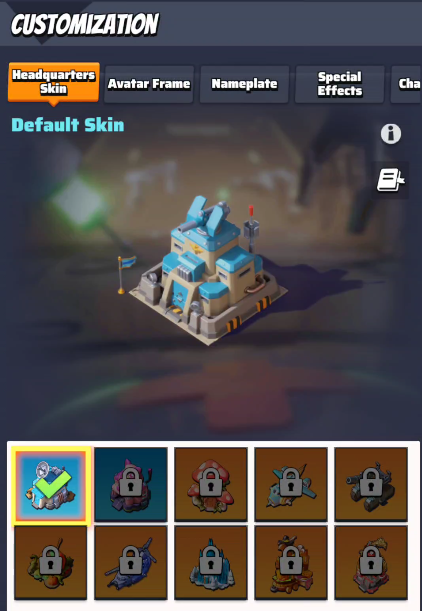
This menu allows you to customize your base, your chat, etc.
Only few of these customizations are won for free during the game, everything else needs to be bought.
HQ Level up requirements
To upgrade the Headquarters to higher levels, both resources and building requirements must be met at each stage.
It’s crucial to advance construction gradually to facilitate smooth progression to the next level of the headquarters and to spare enough resources. Failing to upgrade the Headquarters may result in having a weak squad, as this building determines the cap for Hero levels.
Use 🔨 Builder Copilot to automatically calculate your level up requirements.
HQ Level 1-30 requirements
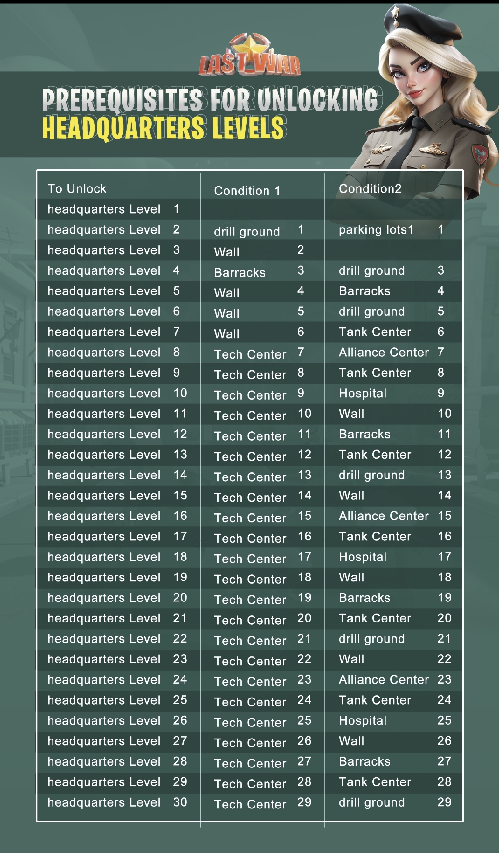
Below is the diagram illustrating the buildings required for each level up to level 30:
Here a more explicit table with Resources and buildings requirements:
To unlock the new Headquarters level the locking building must be leveled up to the HQ level before proceeding. Consider that the amounts are an average as it depends on the researches you did.
| HQ to unlock | First Building | Second Building | Iron | Food | Gold | Days |
| 2 | Drill Ground | Parking lots | ||||
| 3 | Wall | |||||
| 4 | Barracks | Drill Ground | ||||
| 5 | Wall | Barracks | ||||
| 6 | Wall | Drill Ground | ||||
| 7 | Wall | Any of Tank/Aird/Missile Center | ||||
| 8 | Tech Center | Alliance Center | ||||
| 9 | Tech Center | Any of Tank/Aird/Missile Center | ||||
| 10 | Tech Center | Hospital | ||||
| 11 | Tech Center | Wall | ||||
| 12 | Tech Center | Barracks | ||||
| 13 | Tech Center | Any of Tank/Aird/Missile Center | ||||
| 14 | Tech Center | Drill Ground | ||||
| 15 | Tech Center | Wall | ||||
| 16 | Tech Center | Alliance Center | ||||
| 17 | Tech Center | Any of Tank/Aird/Missile Center | ||||
| 18 | Tech Center | Hospital | ||||
| 19 | Tech Center | Wall | ||||
| 20 | Tech Center | Barracks | ||||
| 21 | Tech Center | Any of Tank/Aird/Missile Center | 79.3 M | 79.3 M | 25.6 M | ~3.8 |
| 22 | Tech Center | Drill Ground | 105.6 M | 105.6 M | 33.6 M | ~5.5 |
| 23 | Tech Center | Wall | 131.6 M | 131.6 M | 41.3 M | ~6.4 |
| 24 | Tech Center | Alliance Center | 158.9 M | 158.9 M | 50.4 M | ~8 |
| 25 | Tech Center | Any of Tank/Aird/Missile Center | 270 M | 270 M | 96.5 M | ~11.5 |
| 26 | Tech Center | Hospital | 374 M | 374 M | 121.5 M | ~15 |
| 27 | Tech Center | Wall | 487.6 M | 487.6 M | 156 M | ~22 |
| 28 | Tech Center | Barracks | 691.9 M | 691.9 M | 224.4 M | ~30 |
| 29 | Tech Center | Any of Tank/Aird/Missile Center | 925 M | 925 M | 305 M | ~39 |
| 30 | Tech Center | Drill Ground | 1280 M | 1280 M | 425 M | ~46 |
HQ Level 31-35 Requirements
With Season 2 Celebration‘s new The Age of Oil research tree, it will be possible to level up the Headquarters up to level 35.
To unlock the level up the HQ 31-35 feature you first need to complete the “HQ Expansion Lv1” research of The Age of Oil tree.
The pace of leveling up HQ31-35 is dictated by the requirement of oil, that can only be produced for a certain amount per hour, so it will take a while to reach HQ31. Here are my best timings doing everything as fast as possible:
- After exactly 1 week and 4 hours I was able to start Oil Output I Level 10 research
- After exactly 2 weeks and 4 hours I was able to start Oil Output II Level 4 research and I have 50k oil leftover
- After exactly 3 weeks and 4 hours I was able to start Oil Output II Level 8 research
- Starting from week 3 oil packs will be available but I will continue this list as free to play to give people an indication without purchases.
- After exactly 4 weeks and 4 hours I was able to start Oil Output III Level 1 research
- After exactly 5 weeks and 4 hours I was able to start Oil Output III Level 10 research and I have left 130k oil
- After 6 weeks and a few hours I was able to start HQ31, without purchasing oil.
HQ Expansion Lv1 research requirements
To know all the details to obtain the “HQ Expansion Lv1” please visit this link: Google Spreadsheet Age of Oil Researches
Once I have all the resource/time for the mandatory path I will add here the summary.
Level 31-35 building requirements
Here are the building requirements for the HQ 31-35.
Use 🔨 Builder Copilot to automatically calculate your level up requirements.
Headquarters Lv31
- Research Center Lv30
- Tank, Air or Missile Center Lv30
- Barracks Lv30
- HQ Expansion Lv1
Headquarters Lv32
- Research Center Lv31
- Tank, Air or Missile Center Lv31
- Barracks Lv31
- Wall Lv31
Headquarters Lv33
- Research Center Lv32
- Tank, Air or Missile Center Lv32
- Barracks Lv32
- Hospital Lv32
- Drillground Lv32
Headquarters Lv34
- Research Center Lv33
- Tank, Air or Missile Center Lv33
- Barracks Lv33
- Wall Lv33
- Alliance Center Lv33
Headquarters Lv35
- Research Center Lv34
- Tank, Air or Missile Center Lv34
- Barracks Lv34
- Hospital Lv34
- Drillground Lv34
Builder’s Hut
At the beginning of the game, when your base level is lower than 15, the Builder’s Hut can be your best friend.
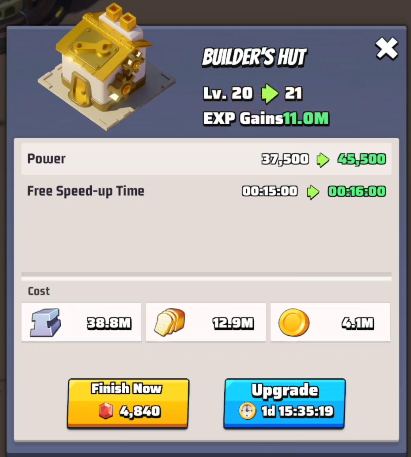
This building allows to gain Free Speed-up Time. By maintaining this building’s level aligned with the Headquarters, you’ll be able to swiftly level up numerous other buildings.
As you progress to higher levels, the effectiveness of these speed-ups diminishes, given the significant resource investment required to upgrade the building. It may not be wise to spend all those resources for a mere one-minute gain per building level.

Actions
When you click on the Builder’s Hut you can access the following actions:
 Survivors
 Builder upgrade
 Level up
Survivors
In this section you can see which survivors are working in this building. You can also change one with another active one that might give a bigger bonus.
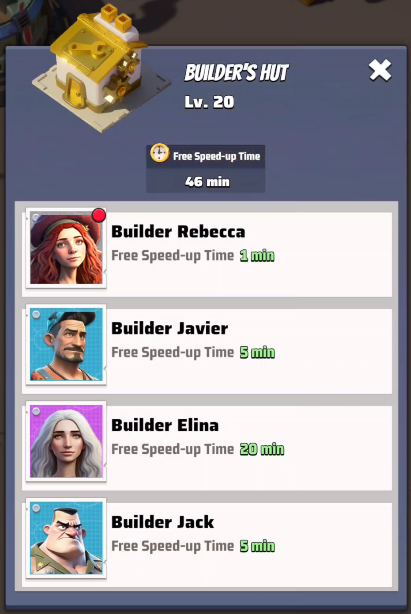
In this case (red dot on the survivor) the first survivor can be replaced with one that has a better bonus. Click on the first survivor.
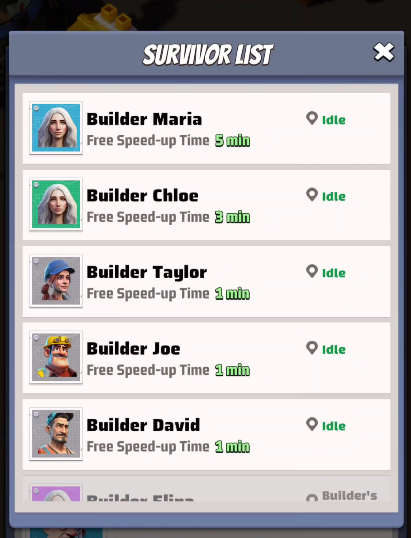
The survivor list opens showing available survivors ordered by bonus. Click on the first survivor to use as replacement.
Builder upgrade
It is possible to buy additional builders.
To keep up with the game pace it is wise to at least buy a second builder.

Gold Mine / Iron Mine / Field
These three buildings are the most important regarding resource production.
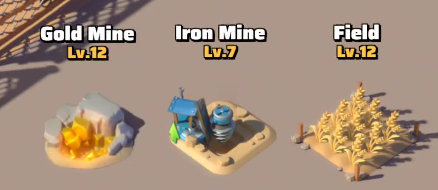
They allow to produce:
- Coin
- Iron
- Food
Coin/Iron/Food
The amount of Coin/Iron/Food resources immediately available goes into the counters at the top of the screen:

These resources are immediately available to be used to level up buildings, carry out research, etc.
Fields and mines
It is important to obtain, upgrade and best manage iron and gold mines.
When new survivors arrive, it’s advantageous to allocate them to production buildings, concentrating them all in one to expedite its growth compared to others.
With such bonuses, even if all gold mines aren’t at their highest level, having one with the highest level, enhanced by survivors, can significantly boost overall gold production per hour.
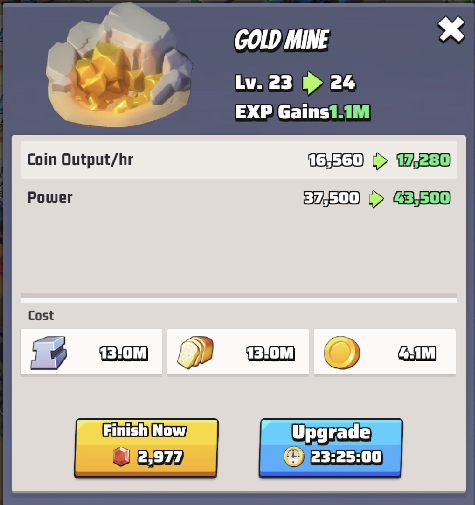
The original hourly production value at level 23 is 16,560 coins per hour
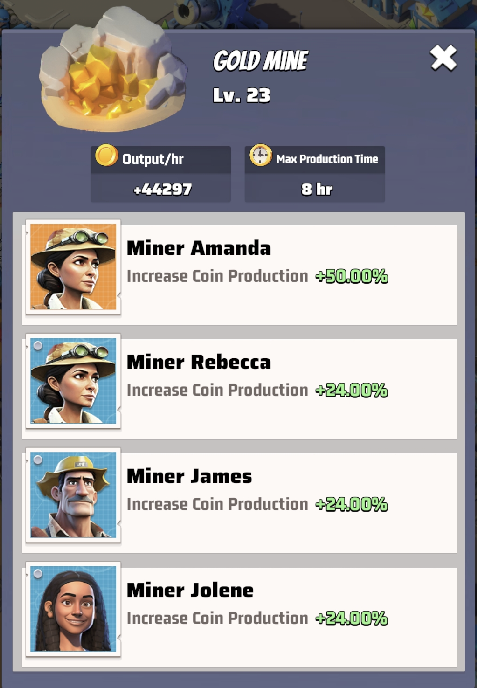
Thanks to the bonuses of the survivors this mine generates more than 2 and a half times the original hourly production value.


If possible please can you provide an update on the benefits of upgrading the HQ level beyond 30?
For example I am aware that you can upgrade your heroes beyond level 150 and that from level 31, sleigh trucks and secret tasks can contain exclusive weapon shard boxes, and they bring in more resources (and the relevant secret tasks give more skill medals/ ore etc).
Are there additional benefits from the HQ being level 32, 33, 34, 35 beyond upgrading the level of Heroes?
There are additional benefits, but I didn’t write them all down. For sure you will have: unlock new levels of secret mobile missions, enhanced truck items (for example you have choice box shard/exclusive weapon), cap of all buildings increase (so huge boost for tank/air/missile buildings), a third oil well unlocks.
Can you make a list of what new buildings are unlocked on every new Headquarters levels up?
I don’t have that information unfortunately, is there anything specific you are looking for?
And also you can actually see most of them if you go on the Hammer icon to build constructions, on each not yet unlocked building there are the conditions to unlock it written in small print.
My Economy tab in the HQ stats has an “Officials” line in each section. The buff is 0%. It is not in the graphic posted above. Do you know what that is?
Officials in this context refers to buffs you acquire when you are assigned a ministry/hat, like secretary of development, science, etc.
Thanks for the headups,its really useful
At HQ 31, you get hero’s max level upgrade to 155… do you get another max level jump at another HQ level?
Each HQ level up increases the cap of Heroes of 5 levels. So at HQ32 hero’s max level cap is 160, HQ33 it is 165, etc.
Hallo habe den skin himmlischer Aufstieg wie geht das mit den Attributen
I guess you are referring to the Eternal Pyramid decoration, the buff automatically applies and your buildings go faster
For HQ31, we get an extra oil well, the deer cart will give Shard/ Weapon Choice Chest, secret tasks will be level 6. Any hidden perks for HQ32 and above?
HQ 33 gives an extra oil well.
Honestly I didn’t look carefully, maybe someone can answer to this. I already have HQ32 but I don’t see additional perks
É possível aumentar a quantidade de ajuda recebida nas construções?
Yes, there are some researches and also some survivors that increase the helps received for constructions.
Is alliance center same as alliance support hub?
Yes, they changed the name of the alliance center into alliance support hub because they needed the “alliance center” name for Season 3 for another building.
How to unlock the second tech center without paying for it?
You can unlock another tech center without paying it once you reach Age of Oil https://www.lastwartutorial.com/season-2-celebration-the-age-of-oil/#new-building-3rd-tech-center
Any advice on how to get enough oil for Hq 33 and higher?
Oil is available through a few ways and events: 1 secret squad mission, radar missions, rewards from zombie invasion, etc . My suggestion is to always max the levels of oil wells immediately as you get them.